
How to Install Pi-hole on Orange Pi / Armbian Boards
I’ve already written a review of the Orange Pi Zero. As it turns out, this little board is perfect for running your own Pi-hole! It’s probably even better than a Raspberry Pi! The cheapest Raspberry Pi you can get with a wired ethernet connection is the Raspberry Pi 1 Model B+, which is listed for $28.95 at PiShop.us (as of May 2021). In contrast, you can get an Orange Pi Zero 512MB for $16.99 + ~$4.00 shipping from AliExpress, or a couple dollars more with a case. (You can also find these items on Amazon, but shipping is more expensive there.) In total, you can save about 30% compared to the Raspberry Pi! Of course, the Raspberry Pi model Zero W might be cheaper, but isn’t a good choice for a Pi-hole – it loses some network stability and speed because of its wireless connection. The Orange Pi Zero, on the other hand, has a wired ethernet connection and performs great!
So, you’ve bought your Orange Pi Zero (or any other Armbian-compatible board), now what? All the tutorials seem to be for Raspberry Pi, so how do you set up Pi-hole on your new Orange Pi? There are 2 things you need to accomplish. First, you need to install Linux on your Pi and get SSH access. Then, you need to install and set up the Pi-hole software.
- 2022-09-27: Updated to include instructions for setting a static IP and for setting the web interface admin password.
Install Armbian Linux on the Orange Pi
Although Orange Pi provides Orange Pi OS, we’re going to use Armbian. Orange Pi OS sees little use and is poorly maintained compared to Armbian, which has a bigger community because of its support for a wide variety of ARM boards.
-
Download Armbian Jammy (under the variants section near the bottom) from the Armbian Orange Pi Zero (Zero+) (Zero2) (other) page. Armbian Jammy is based on Ubuntu Jammy. (If a newer Ubuntu-based Armbian image is available, use that! Debian images like Bookworm are also fine, though I prefer Ubuntu.)
-
Download Balena Etcher and use it to create an SD card based on the Armbian image you downloaded. For more detailed instructions, see the Armbian docs.
-
Put the SD card in the Pi, plug the Pi into your network via ethernet, and plug in the power cable to turn it on.
-
Assign or find the IP address of your Pi.
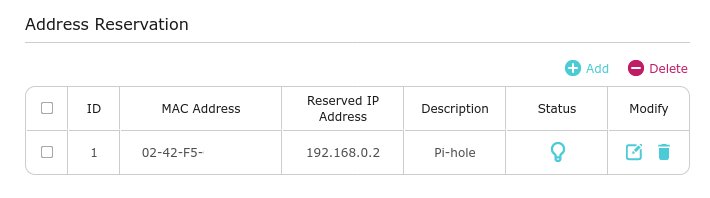
If possible, you should assign a static LAN IP address to your Pi with your router. This is preferable because it’s guaranteed not to change and break your configuration. Try to do this in your router’s settings. It might be called “DHCP Reservation” or similar. I set mine to 192.168.0.2, as you can see below. The process to set a DHCP reservation can vary quite a bit depending on your router, so see more info here if you need it. And don’t panic if your router doesn’t support this – there are other ways to set a static IP, and in a worst-case scenario the dynamic IP automatically assigned by your router is unlikely to change anyway.
If you can’t assign a static IP from your router, you’ll have to figure out the IP your router assigned automatically. The easiest way is to look for the device in your router’s devices list, often at http://192.168.0.1. (If that doesn’t work, you might find instructions for connecting to your router on a sticker on the router, or in the manual.) Alternatively, you can use the Fing App or Angry IP to find the IP of the Pi device.
-
SSH to the Pi and login. On macOS, you can simply run
ssh
root@<pi-ip-address-here>
(and replace<pi-ip-address-here>with the actual IP from step 4). On Windows, you’ll have to install an SSH client like PuTTY and use that to connect (IP: <Pi IP>, Username:root, Password:1234, Port: default/22). -
As described in the docs, login as
rootusing password1234and create a new user account for yourself. You’ll use that new user account going forward – it’s best not to use root as your primary account. -
If you did not assign a static IP address via a DHPC reservation on your router in step 4, you should configure your Pi for a static IP address now. You can do so by running
sudo armbian-configand entering Network settings, as shown below.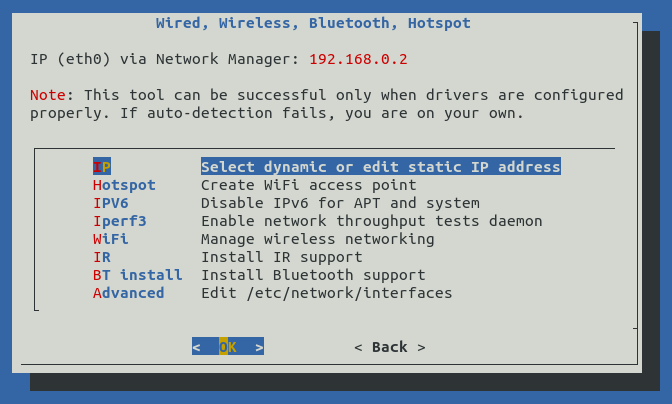
-
When you’re finished, you can run
exitto log out and disconnect.
Congrats, you’ve installed Linux on your Orange Pi and logged in! Now, let’s install and set up Pi-hole!
Install and Setup Pi-hole
Installing the Pi-hole software is pretty easy, and you can use the official instructions if you get confused or want more detail.
- Connect to the Pi using the account you created in step 6 above. To do so,
run
ssh <your-username>@<pi-ip-address-here>on macOS, or similarly using PuTTY on Windows. - Run
curl -sSL https://install.pi-hole.net | bashon the Pi. - Run
pihole -a -pto set the admin password for the web interface. You’ll use this to log in to the web interface from other computers. - Configure your network to use the Pi-hole as its DNS server. This is the
critical step that will make bad domains (advertisers, etc) be blocked on your
network.
- If possible, you should try to configure your router to use the Pi-hole as the DNS server (as in method 1).
- If that doesn’t work, try using the Pi-hole as your network’s DHCP server.
- Finally, if neither of the above work, configure each device to use the Pi-hole as the DNS server manually as in method 3 here.
Well, that’s it! You should now have network-wide ad blocking with your Pi-hole!
And if you ever want to temporarily disable it, see how to do so here.
Did you like this tutorial? Let me know @mike_kasberg
About the Author

👋 Hi, I'm Mike! I'm a husband, I'm a father, and I'm a staff software engineer at Strava. I use Ubuntu Linux daily at work and at home. And I enjoy writing about Linux, open source, programming, 3D printing, tech, and other random topics. I'd love to have you follow me on X or LinkedIn to show your support and see when I write new content!
I run this blog in my spare time. There's no need to pay to access any of the content on this site, but if you find my content useful and would like to show your support, buying me a coffee is a small gesture to let me know what you like and encourage me to write more great content!
You can also support me by visiting LinuxLaptopPrices.com, a website I run as a side project.
Related Posts
- Review: Orange Pi Zero 03 Jul 2020
- A Bookmark to Temporarily Disable your Pi-hole 26 Jun 2020
- Headless Setup for a Raspberry Pi Zero-W 19 Jun 2020