3D Printing with OpenSCAD
As I mentioned in my last blog post, I’ve been getting into 3D printing recently. The deeper I get into the 3D printing world, the more I become interested in designing my own 3D models. It’s cool to print a model that someone else created, but for me it’s way more fun to print something that I created. It scratches my itch to “build something out of nothing” in a very physical way.
There are a wide variety of 3D modeling applications, and I experimented with several as I learned more about 3D printing. Some are CAD programs that are ideal for designing precise parts, others come with more artistic features for designing life-like models. For a while I was using Tinkercad, and I still think that’s a great place to start for anyone new to 3D printing. But more recently, I’ve developed a strong affection for OpenSCAD. OpenSCAD is CAD-oriented software that describes itself as a “3D compiler”. Rather than using an interactive modeling UI, you write a script that produces a 3D model. As such, it’s well-suited to models that contain patterns and geometric shapes, since these are relatively easy to produce with a script compared to a UI. OpenSCAD is also well-suited to “parametric” and open source models – the model is just a text file, so you can even use git for version control! As someone with a programming background, I found it very natural and fun to work with.
If you’re curious about OpenSCAD, I’d encourage you to give it a try. The cheat sheet has everything you’ll need to get started. There are commands that generate geometric primitives (like cubes and spheres) and commands that add or subtract one shape from another. Once you know about six commands (translate, difference, rotate, and a few primitives), you already know enough to build some really intricate models. There aren’t many commands to learn, and once you get a feel for how OpenSCAD works it’s really intuitive!
Customizable Hex Coaster
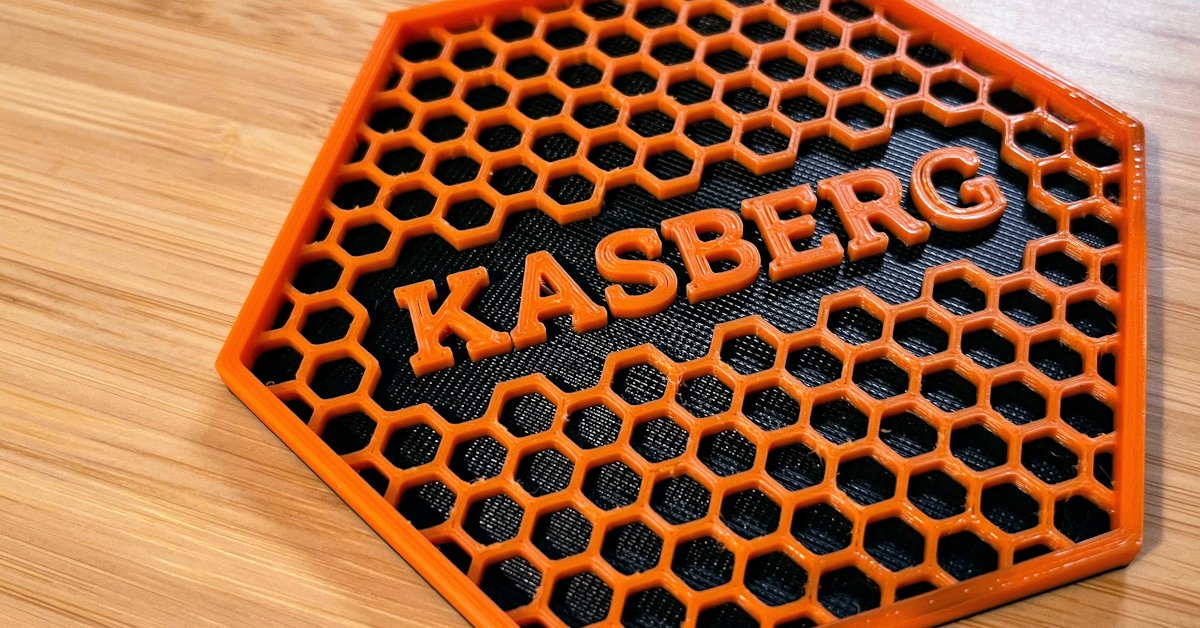
The first project I modeled with OpenSCAD with it made me fall in love with it. I wanted to add a few 3D printed decorations around my desk, and I though a coaster would be a good place to start. A 3D printed coaster is a useful item that’s also simple enough that I could design it myself from sctatch. I came up with an idea to use a tiled hexagonal pattern, and the project seemed like a great fit for OpenSCAD. It was simple enough to be an achievable goal for someone new to the program, but hard enough to be interesting. My completed Customizable Hex Coaster model is available on Printables (and GitHub) if you want to check it out for yourself.
Building the model in OpenSCAD was a lot of fun! I was a little surprised that I ended up using a decent amount of high-school level trigonometry to make everything fit right, and while that might sound daunting I actually really enjoyed it. It felt a lot like solving a crossword or sudoku, using a muscle I hadn’t exercised in a while. And it was cool to see a physical application of trig. After doing trig with hexagons for a couple hours, they’ve become my new favorite shape! Here are a few interesting properties I discovered along the way:
- The length of an edge of a hexagon is exactly half the length of it’s longest centerline
- You can break a hexagon down into 6 equilateral triangles, and those can be further broken down into 30-60-90 right triangles
- You can use trig to find the proportion of a hexagon’s height to its width, or length of an edge to height

For me, there’s something very satisfying about getting the numbers exactly right so that you can create a repeating pattern of hexagon tiles. It’s trickier than you might initially expect! For example, here are some of the challenges I faced along the way:
- Figuring out how to make a hexagon in OpenSCAD
- Calculating the height of a hexagon from its width
- Accounting for the thickness of the walls in the pattern
- Figuring out how to tile a hexagon pattern within a hexagon
Notably, I didn’t Google for the solution to any of these, which was refreshing – I had all the tools I needed to figure this out between some basic trig knowledge and the OpenSCAD cheat sheet.
Onward!
Building the hexagon coaster was fun, and it was a great intro to OpenSCAD. I have the coaster sitting on my desk, and I use it almost every day! But I have some even cooler projects coming down the pipeline. I’ve been experimenting more with OpenSCAD, and I’m working on an idea to incoporate real world data into my OpenSCAD scripts. So hopefully I’ll have more cool projects to share in a couple months!
I do most of my 3D printing on a Prusa MINI, and after owning it for several
years I’ve been very impressed with Prusa as a company (very supportive of open
souce) and with the performance of my Prusa printer (it’s great, rarely needs
maintenance and does excellent prints). Want to get your own Prusa 3D printer?
If you use my referral code @mkasberg_363797 at checkout, we will both get
reward points!
About the Author

👋 Hi, I'm Mike! I'm a husband, I'm a father, and I'm a staff software engineer at Strava. I use Ubuntu Linux daily at work and at home. And I enjoy writing about Linux, open source, programming, 3D printing, tech, and other random topics. I'd love to have you follow me on X or LinkedIn to show your support and see when I write new content!
I run this blog in my spare time. There's no need to pay to access any of the content on this site, but if you find my content useful and would like to show your support, buying me a coffee is a small gesture to let me know what you like and encourage me to write more great content!
Related Posts
- 3 Months of 3D Printing 11 Jan 2023
- 3D Printing Map Figurines with GPS 17 Jul 2023
- 3D Printing the Strava Logo 27 Apr 2023