I Installed My Own Coax Cable for My Internet Modem (and You Can Too)
Like in many houses, our cable modem was an eye sore on a shelf in our living room for many years. After all, that’s where the coax outlet for a TV always is right? The location wasn’t ideal. People tend to put their internet cable modem near their TV because that’s where the coax outlet happens to be, not because that’s where they actually want their internet modem. I wanted to move our cable modem and wifi router to our basement mechanical room to get them out of the living room. Moving the internet equipment to our basement would give me more room for additional equipment near the router. But our basement didn’t have any coax outlets! I learned to run coax cable myself so I could move all our networking equipment to the basement. I’m glad I did, because I love the new setup and it wasn’t hard to do!
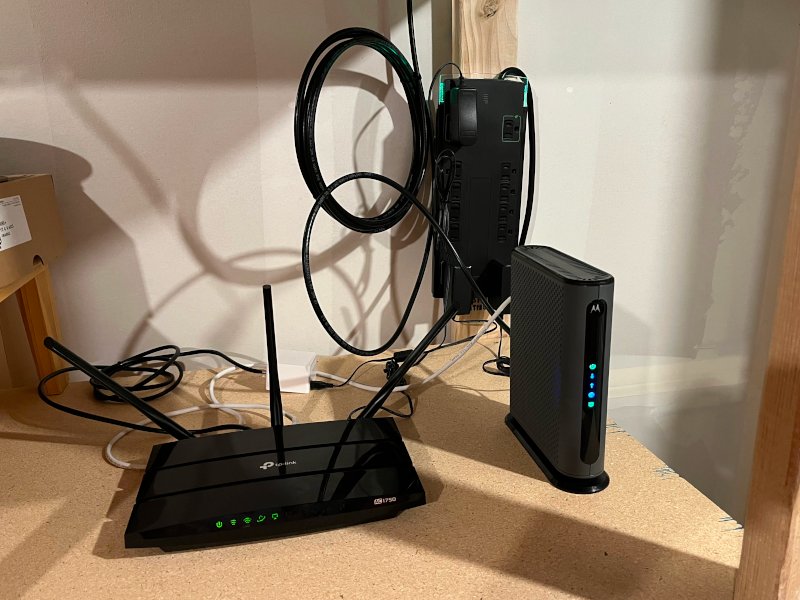
It’s really nice having our networking equipment in the basement mechanical room. It might not be a big deal to have a single modem/router combo on a shelf somewhere, but I’ve already added some additional equipment to my home network since I moved the modem, and I want to add more in the near future. I currently have a cable modem, a separate TP-Link wifi router, and a Pi-hole. And I’m planning to add a NAS. And probably more equipment I haven’t thought of yet. Having a dedicated space for all this networking equipment in the mechanical room in the basement is a big benefit because it gives me plenty of room to expand and makes our living room look less cluttered.
I was a little intimidated by running coax cable myself for the first time, but it turned out to be very easy to do, and you don’t need many special tools. I think any homeowner comfortable with a drill could do it! The hardest part for me was finding a good location to route the cable. Ideally, you’d run the cable through an attic, crawlspace, or unfinished basement. I didn’t have access to any of these from our (small) basement mechanical room, so I chose to run the coax cable along the house exterior. This is a pretty common practice in the area where I live, and our house already had some other exterior coax so adding one more exterior cable wasn’t a big deal. I’m happy with the result!
Here are the tools and supplies I used:
- 100 ft. RG6 Quad Shield Coax Cable
- Coax Cable Clamps
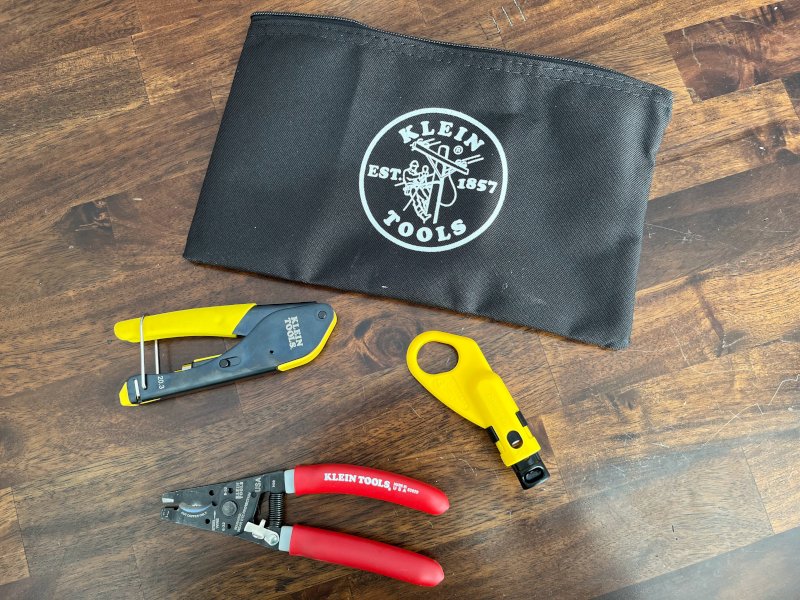
- Klein Coax Installation Tool Set (cutters, a stripper, and a crimper)
- Compression Connectors (included in the tool set)
- a drill
- zip ties
I was fortunate that I didn’t have to drill directly through an exterior wall, but you might have to. If you do, there are several good YouTube videos that can teach you how to drill through an exterior wall and seal the hole properly to prevent water intrusion. The rest is pretty easy. I used a cable clamp every several feet to hold the cable in place. I left a service loop (a few feet of extra cable) at both ends in case I need it later, and then I cut the cable and crimped a connector on both ends. I chose not to use a wall plate in my mechanical room – fewer connections along the cable means less potential signal degradation.
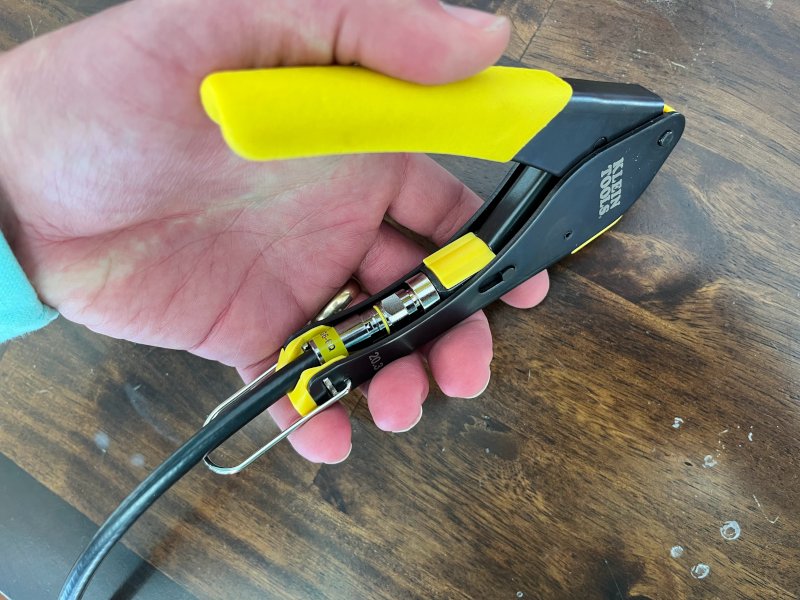
Learning to crimp the cable was also easier than I would have expected it to be. The coax cable stripper gets the cable stripped to exactly the right length, and then you just peel back the braid and crimp the compression connector. You can learn to crimp coax in 5 minutes on YouTube if you’ve never done it before.
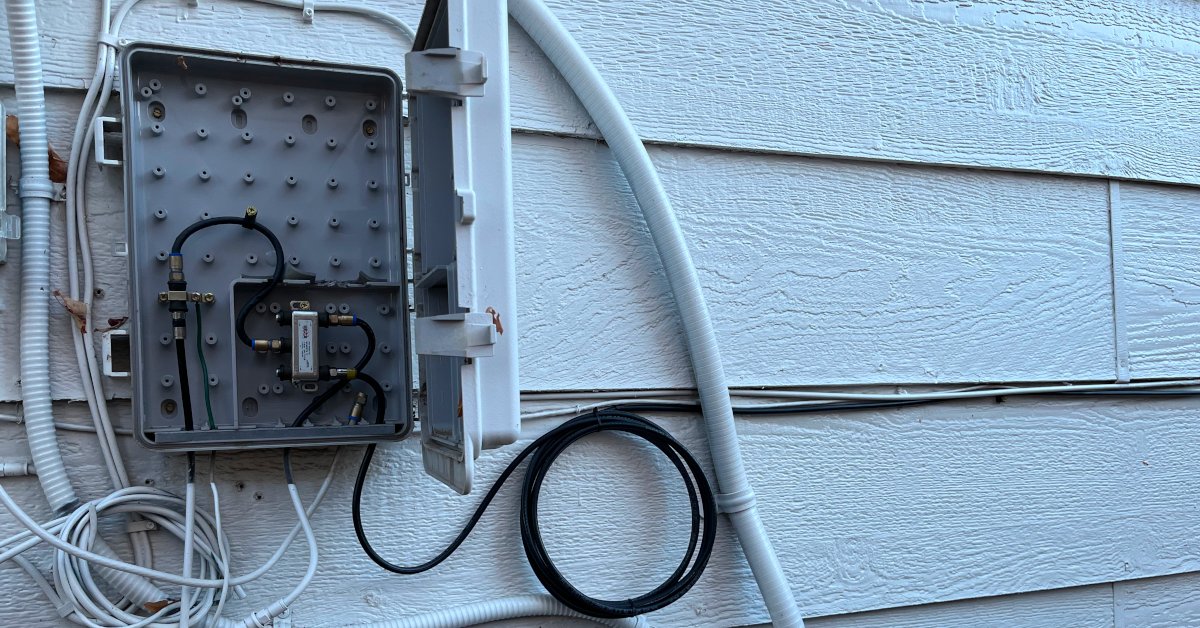
I happened to have a free port on an existing splitter near my exterior cable box, so I just connected my new cable to that. If you don’t have any free ports, you’d need to either disconnect an existing cable or get a bigger splitter to add your new connection.
I wanted to make sure my new coax cable didn’t have any signal problems and was at least as fast as my existing setup, so I ran a speed test with my cable modem plugged directly into my laptop (to test without wifi slowdown!) on my old and new cables. My new cable showed nearly identical speeds to my old one, confirming that there weren’t any problems along the new cable. Hooray!
Installing my own coax cable was a great experience that turned out to be easier than I thought it would be, and I’m glad I decided to do this myself. My new setup is nicer, I know I did quality work, and it was actually pretty cheap to do! While this blog post isn’t a detailed step-by-step guide to installing your own coax cable in your specific situation, I hope it can be an encouragement to you if you’re thinking about trying. There should be enough information here to give you a really good overview of the process, and you should be able to fill in any missing details with some YouTube videos.
About the Author

👋 Hi, I'm Mike! I'm a husband, I'm a father, and I'm a staff software engineer at Strava. I use Ubuntu Linux daily at work and at home. And I enjoy writing about Linux, open source, programming, 3D printing, tech, and other random topics. I'd love to have you follow me on X or LinkedIn to show your support and see when I write new content!
I run this blog in my spare time. There's no need to pay to access any of the content on this site, but if you find my content useful and would like to show your support, buying me a coffee is a small gesture to let me know what you like and encourage me to write more great content!