
How to Test and Optimize Your Home Wifi Coverage
I’m sure everyone’s had a frustrating experience trying to optimize their home wifi network. You put the router in a great spot for the TV, but you have bad wifi on your deck. You move it somewhere to provide better coverage for your deck, but it causes intermittent problems streaming movies to your TV. Figuring out the ideal wifi setup is tricky, and poorly documented. (But I’m hoping to provide some better documentation in this blog post!) I recently optimized my home wifi network to provide better coverage throughout my house, and I discovered some cool techniques along the way that I want to share.
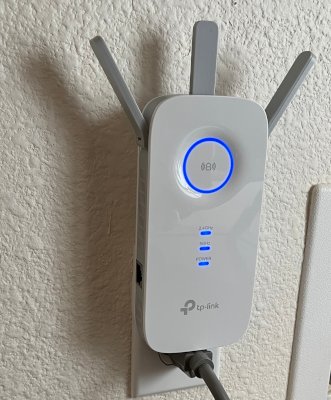
Last year I moved my Wifi router to the basement. This was a great improvement! It gave me a lot more space to put additional devices near my router (like my Pi-Hole and NAS). It also moved my wifi router closer to my basement office, improving the wireless connection I use all day at work. But there were some downsides too. I realized that after moving my router to the basement, my wifi would intermittently lose the connection on my deck and in my yard, and the speed from my bedroom became slower. (Who could’ve predicted that???) I bought a wireless range extender (a TP-Link RE450) to improve my wireless coverage, but I wanted to find the optimal location for the range extender, and I also wanted to measure how much difference it made. (And I wanted something more accurate than counting the bars on my phone, which never seem that accurate anyway!)
You can sort of use internet speed tests (like speedtest.net) for this, but that’s not really measuring what you want or getting the most accurate measurement. Internet speed tests measure the speed of your internet, which is limited by your ISP, is probably slower than your wifi, and could be affected by a wide range of factors. If you’ve tried measuring your wifi speed using this method before and you measured the same speed pretty much everywhere, it’s probably because you’re measuring your internet speed rather than your wifi speed. Not all wifi usage is a transfer from the internet – I often transfer large files to or from my NAS, and that transfer isn’t limited my my internet speed. Aside from that, measuring wifi speed instead of internet speed uses a more specific and more sensitive measurement that ultimately results in a better understanding of my home’s wifi – which is something we can optimize!
There are some tools available that are supposed to be able to generate a heatmap image of the wifi coverage in your house (or any other area) like python-wifi-survey-heatmap. When I first started trying to optimize my wifi setup, I looked into a bunch of these tools, but I never ended up actually using them. I found that they all required much more effort than I wanted to invest. (To start with, they all require a floor plan of your house, which I don’t have.) This might be exactly what you’re looking for if you want to invest many hours into building a detailed wifi heat map, but I’m guessing that, like me, you want something faster and easier. Let me share what I came up with.
How to Test Your Wifi Coverage
-
You need to be able to access another device on your network with ssh. Ideally, this device is connected to your router with an ethernet cable (not wifi). Some wifi routers allow ssh access, and that would be ideal if yours supports it. I used my NAS. If you don’t have either of those, any macOS or Linux computer will work if you run an ssh server (temporarily) on the computer. You could plug the computer into your router with an ethernet cable, or use wifi and put it directly next to the router. Note the IP address of the device you’ll be connecting to – we’ll call this device A.
-
Using a different laptop (our test computer), stand near your router. We’re going to run an ssh command to test the network speed from device A to your laptop. Run this command on your laptop, replacing
192.168.0.1with the IP of device A from step (1):$ ssh 192.168.0.1 'dd if=/dev/zero bs=1GB count=1 2>/dev/null' | dd of=/dev/null status=progressThis command runs
dd if=/dev/zero bs=1GBon device A to produce a gigabyte of zeroes. That data is sent over the network to your laptop, and piped intodd of=/dev/null, while measuring the progress. You’ll see a live report that includes the transfer speed. (If your wifi is ridiculously fast, you can change thecountto send more than 1GB.) When the transfer finishes (typically 10-60 seconds), you’ll see a report of the average transfer speed in MB/s. Make note of this, and the location you were in. (Since you were right next to your router, we’ll use this as a baseline – the fastest speed we expect to see.) -
Repeat step (2) at various locations around your house. Test all the spots you might want to use your computer. Your office, the TV room, your bedroom, the kitchen, the deck, etc. Note the speed at each location. You’ll quickly develop a sense of where your wifi quality is great and where it’s low.
-
Make a change and re-test to see if things got better or worse. Here are some things you might consider changing to improve your wifi quality:
- Move your router
- Change your wifi channel
- Change your wifi band (2.4Ghz/5Ghz)
- Add a wifi range extender
- Replace your router
That’s it! As you can see, by testing the speed to transfer 1GB of data over wifi from various locations, we can easily get a sense for where the wifi is good and where it’s bad. And by running the same test before and after a change, we can get a sense for how much the change helped or hurt the wifi performance.
If none of that ssh stuff made sense to you, or if you don’t have a second
device with ssh access to test with, you can run an internet speed test at
speedtest.net instead of the command in step (2)
above. Just be aware that you’re measuring internet speed – not wifi speed –
so it’s likely to be the same everywhere except near the edges of your coverage.
I hope this helps you get a great wifi setup in your own house!
About the Author

👋 Hi, I'm Mike! I'm a husband, I'm a father, and I'm a staff software engineer at Strava. I use Ubuntu Linux daily at work and at home. And I enjoy writing about Linux, open source, programming, 3D printing, tech, and other random topics. I'd love to have you follow me on X or LinkedIn to show your support and see when I write new content!
I run this blog in my spare time. There's no need to pay to access any of the content on this site, but if you find my content useful and would like to show your support, buying me a coffee is a small gesture to let me know what you like and encourage me to write more great content!